
Add Your Heading Text Here
The most workable route is likely to treat the “Livingroom Couch” device as a Tuya-compatible device and have your webpage call a small local/server-side controller. Community projects such as TinyTuya can control Tuya-compatible switches over the LAN, including plugs and switches.
The architecture I’d recommend is:
Web page → JavaScript → small API on your server → Geeni/Tuya switch
I would not put the Geeni/Tuya credentials or device key directly inside the webpage JavaScript, because anyone loading the page could see them.
For example, the webpage itself can eventually be as simple as:
<button onclick=”couchOn()”>Livingroom Couch ON</button>
<button onclick=”couchOff()”>Livingroom Couch OFF</button>
<script>
async function couchOn() {
const response = await fetch(‘/api/livingroom-couch/on’, {
method: ‘POST’
});
console.log(await response.json());
}
async function couchOff() {
const response = await fetch(‘/api/livingroom-couch/off’, {
method: ‘POST’
});
console.log(await response.json());
}
</script>
Then your server handles the actual command to the switch.
Since you already have a Synology/web-server environment, we could make the backend live there and keep the actual Geeni/Tuya credentials completely hidden from the browser.
Our first job is to identify exactly what “Livingroom Couch” is. If it is a Geeni smart plug or switch, tell me the model number from the device or Geeni app, and we can work through getting its device ID/IP and determine whether we can control it locally without moving it out of the Geeni app. (My Geeni)
One important point: this page alone will not yet control the Geeni switch. The buttons are complete, but we still need to build the /api/livingroom-couch/on and /off backend that actually talks to the device.
That is the part I’d do next. We can make the backend specifically for your Synology so clicking ON actually turns Livingroom Couch on.
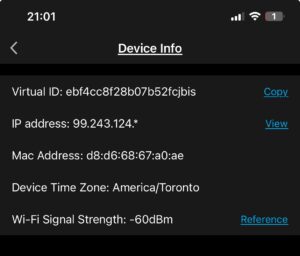
Yes — this is useful. I can see the information we need to start identifying the Geeni device:
Virtual ID:
ebf4cc8f28b07b52fcjbisMAC address:
d8:d6:68:67:a0:aeWi-Fi signal:
-60 dBm, which is quite reasonable.Time zone: America/Toronto
The 99.243.124.* address shown is almost certainly the public Internet IP associated with the connection, not the switch’s local LAN address. For direct local control, we’re looking for something like 192.168.1.xxx or 192.168.50.xxx.
The important part
The Virtual ID is very useful, but for local Tuya/Geeni control we will normally need three thingsWe have the first one.
Don’t put the Virtual ID or eventual Local Key into the public HTML page.
We’ll keep those on the server side.
Next, let’s find the local IP address of d8:d6:68:67:a0:ae on your network. Since you’re using an ASUS router, we can find that from the router’s client list.
If you open your ASUS router administration page, I can walk you through exactly where to look.
Perfect. So we now have:
Device:      Livingroom Couch
Device ID:   ebf4cc8f28b07b52fcjbis
LAN IP:      192.168.1.162
MAC:         d8:d6:68:67:a0:ae
We’re getting close. Don’t change the HTML yet. The missing piece for direct LAN control is the Tuya Local Key associated with that Device ID. The Local Key is different from the Virtual/Device ID and should be kept private.
Once we obtain it, we can first test a command directly against 192.168.1.162. After that works, we’ll connect it to the ON/OFF buttons in your webpage.
I can walk you through getting the Local Key next.
Good. The next step is obtaining the Local Key. Geeni devices are generally based on Tuya’s platform, and one common way to retrieve the key is through the Tuya IoT developer platform.
I can walk you through it one screen at a time so we don’t change anything unnecessarily.
Step 1
On your computer, open:
Sign in or create a free Tuya developer account.
Once you’re logged in, stop there and send me a screenshot of what you see. I’ll tell you exactly what to click next.
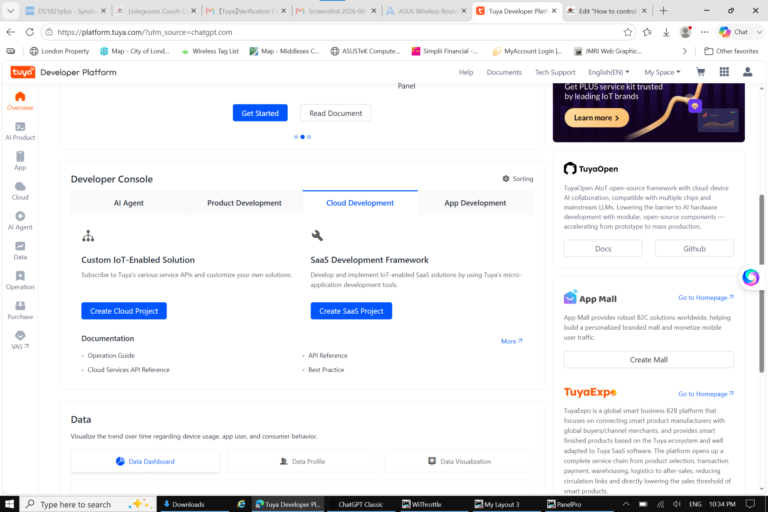
Yes, you’re in the right place.
I can see Developer Console → Cloud Development, and there is a blue Create Cloud Project button on the left side.
Click Create Cloud Project.
Don’t change anything else yet. After you click it, send me a screenshot of the next screen and we’ll fill it out together.
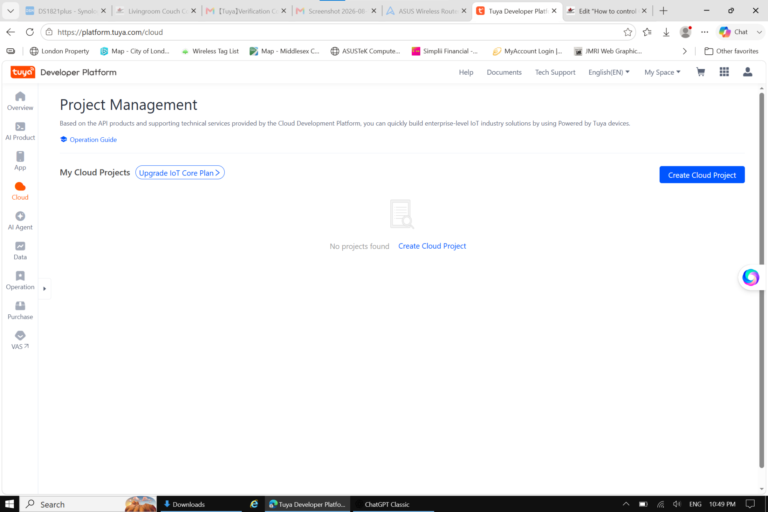
That’s exactly the right screen. It says “No projects found,” so we’re starting fresh.
Click the blue Create Cloud Project button in the upper-right corner.
You’ll get a form asking for things such as the Project Name, Industry, Development Method, and Data Center.
Don’t submit it yet. Send me a screenshot of that form, and I’ll tell you exactly what to enter in each field.
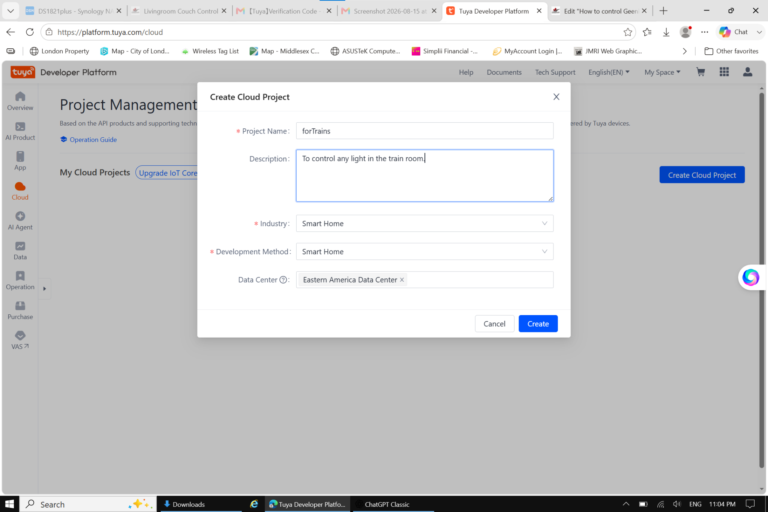
That looks good. 👍
For what we’re doing, I would keep the settings exactly as you have them:
Project Name:
forTrains— goodDescription:
To control any light in the train room— goodIndustry:
Smart Home— correctDevelopment Method:
Smart Home— correctData Center:
Eastern America Data Center— appropriate for your Canadian account/device
Go ahead and click the blue Create button.
After it creates the project, stop there and send me the next screenshot. Then we’ll work on linking your Geeni account/device to the project.
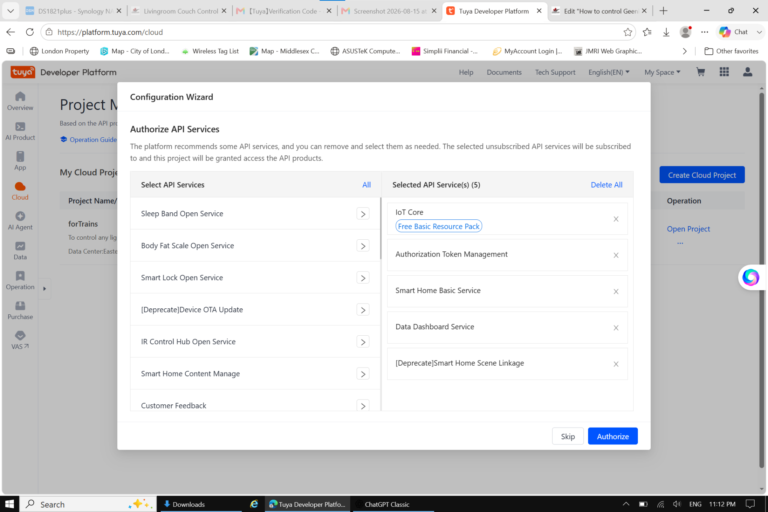
Excellent — you’re at the Authorize API Services step.
The five services already selected on the right are fine for our purpose, especially:
IoT Core
Authorization Token Management
Smart Home Basic Service
You don’t need to add anything else right now.
Click the blue Authorize button at the bottom-right.
After that, send me the next screenshot. The next major job will be linking the Geeni account/device to this Tuya project so that we can get access to Livingroom Couch.
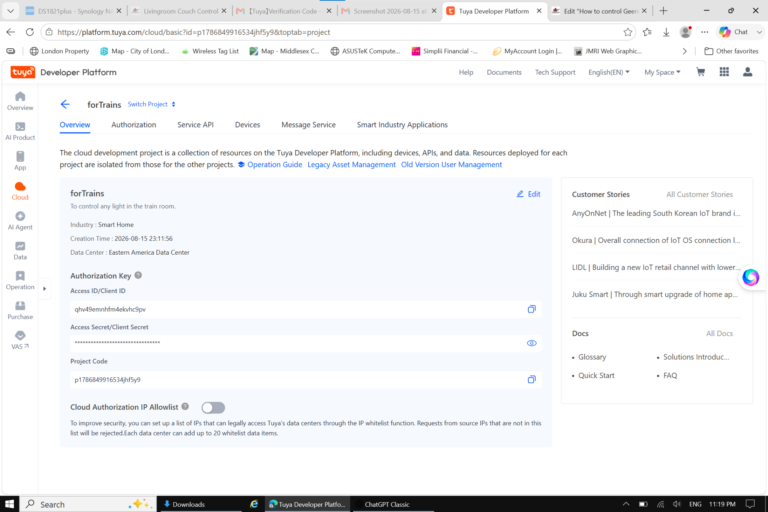
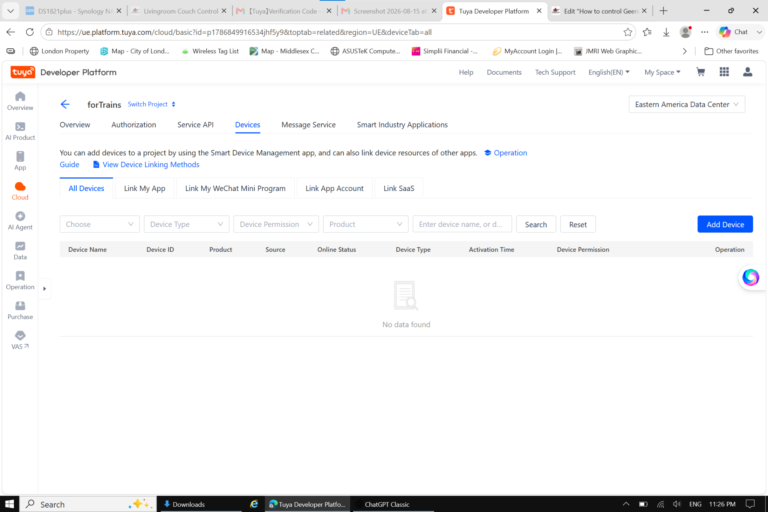
Yes, this is the screen we wanted.
I can see the Link App Account tab near the top. That’s the next step because we need to associate the account containing Livingroom Couch with this forTrains project.
Click Link App Account.
You should then see an option to Add App Account or a QR-code linking process.
Send me a screenshot of what appears after you click Link App Account, and we’ll do that part next.
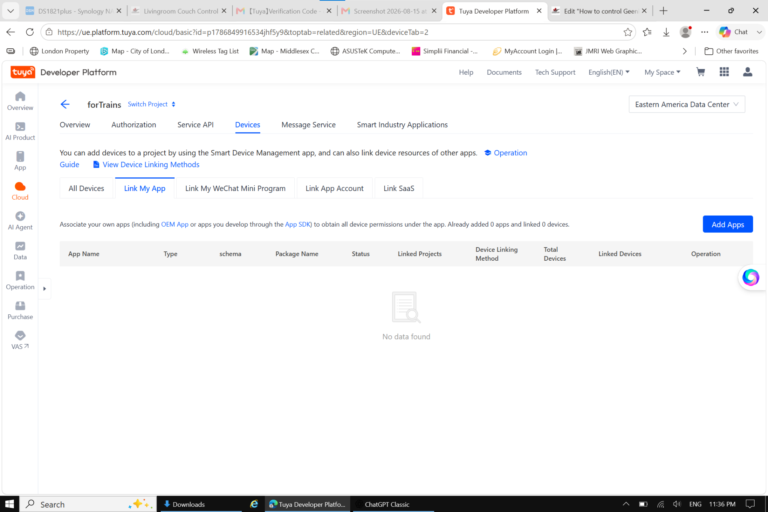
You clicked Link My App, which is why you’re seeing Add Apps. We want the tab just to the right of it.
Click Link App Account at the top — the tab between Link My WeChat Mini Program and Link SaaS.
Don’t click Add Apps.
Once you click Link App Account, send me the next screenshot.
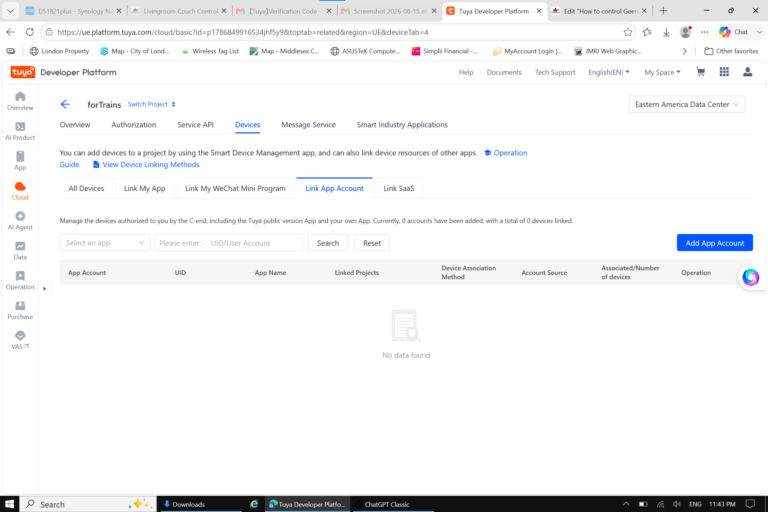
Yes — now you’re on the correct tab. 👍
I can see the blue Add App Account button on the right.
Click Add App Account.
It should bring up a window with a QR code and some account-linking options. Don’t scan anything yet. Send me a screenshot of that window first, because we need to make sure we’re linking the correct type of account for your Geeni devices.
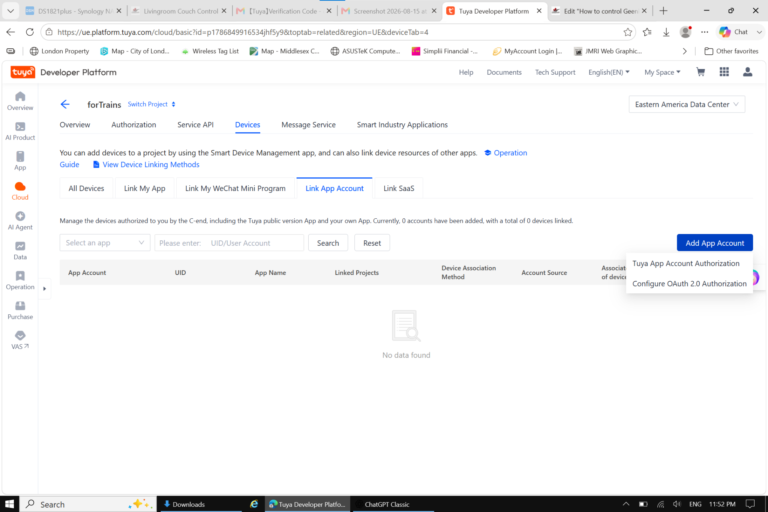

That’s the correct menu. Choose Tuya App Account Authorization — the top option.
However, there’s an important catch before we go much further: Tuya’s current instructions say this QR-code method is scanned using the Tuya Smart or Smart Life app. (Tuya Developer) Your switch is presently registered in the Geeni app, so we need to see whether Tuya recognizes that Geeni account/device through this authorization process.
Click Tuya App Account Authorization. When the QR-code window appears, send me a screenshot before doing anything with the switch. I don’t want you resetting or removing Livingroom Couch from Geeni unless we determine that’s actually necessary.
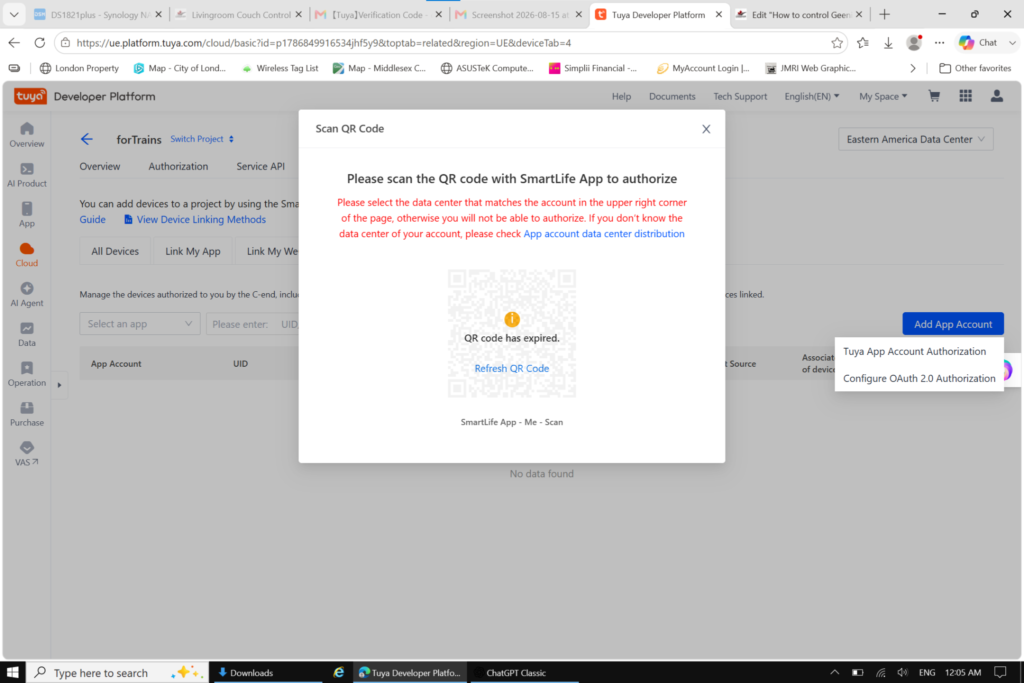
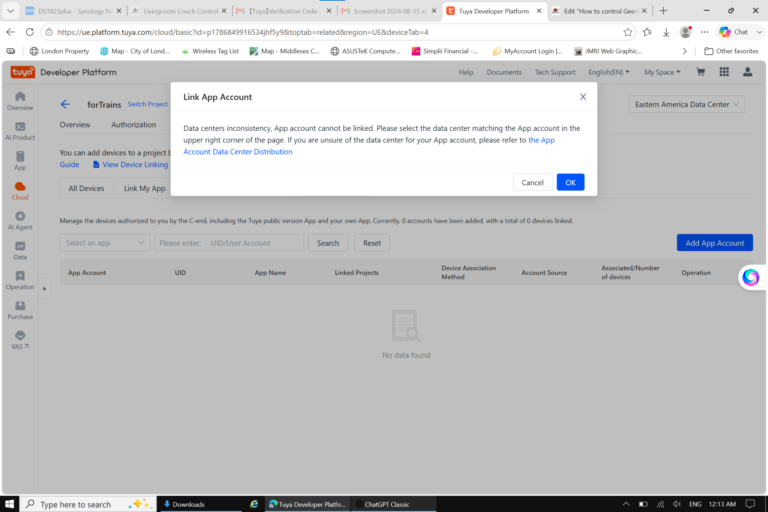
You’re still on the same error window. That’s okay.
Click the blue OK button first. That will close this message.
Then, in the upper-right corner, click the dropdown that currently says:
Eastern America Data Center ▼
Open that dropdown and send me a screenshot with the list of data centers showing. Then I’ll tell you which one to try next.
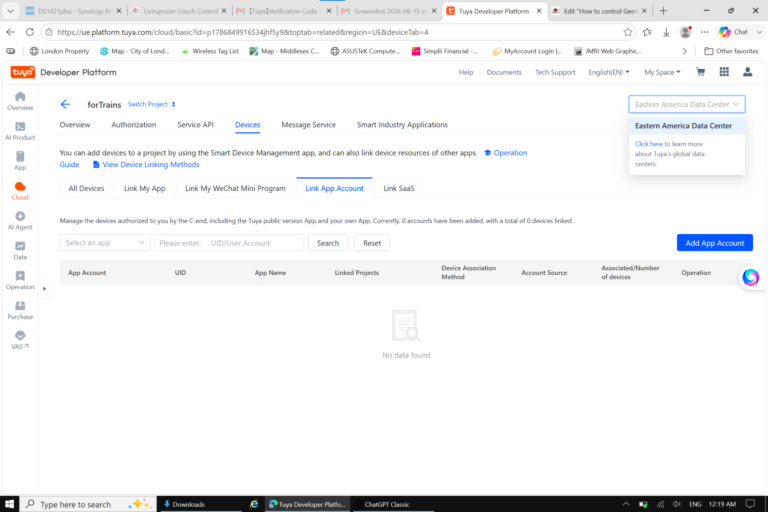
I see the problem now. Your dropdown shows only “Eastern America Data Center.” There aren’t any other data centers available for this particular forTrains project.
That means we can’t simply switch this project to another region. The project itself was created for Eastern America.
The error we received tells us the app account you scanned belongs to a different Tuya data center.
Before we create another project or change anything, click the blue “Click here” link underneath the data-center dropdown—the one that says “learn more about Tuya’s global data centers.”
That should help us determine which data center your app account actually belongs to. Send me a screenshot of what comes up, and we’ll choose the correct region rather than guessing.
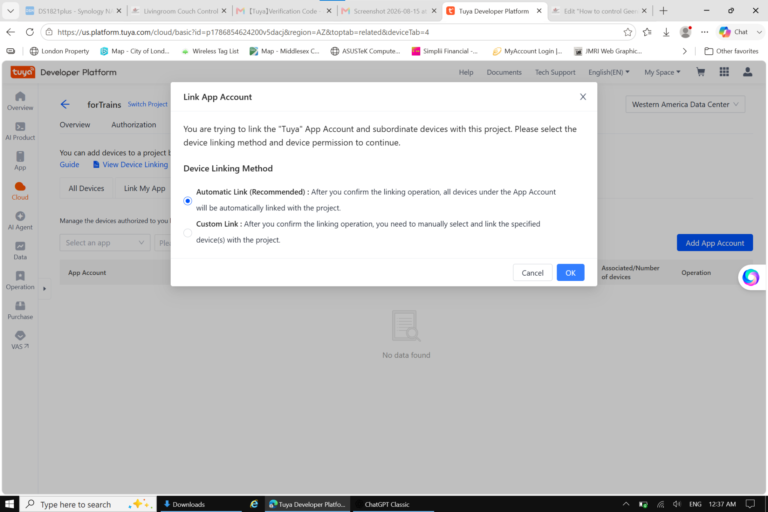
Now we’re getting somewhere. Western America Data Center is selected, and Tuya has accepted the account far enough to ask how you want to link the devices. That strongly indicates we found the correct data center.
Leave Automatic Link (Recommended) selected.
Then click the blue OK button.
That tells Tuya to associate all devices from that app account with the forTrains project. It does not mean all of them have to be controlled by our webpage—we’ll only use Livingroom Couch.
After you click OK, send me the next screenshot. We want to see whether Livingroom Couch appears in the device list.
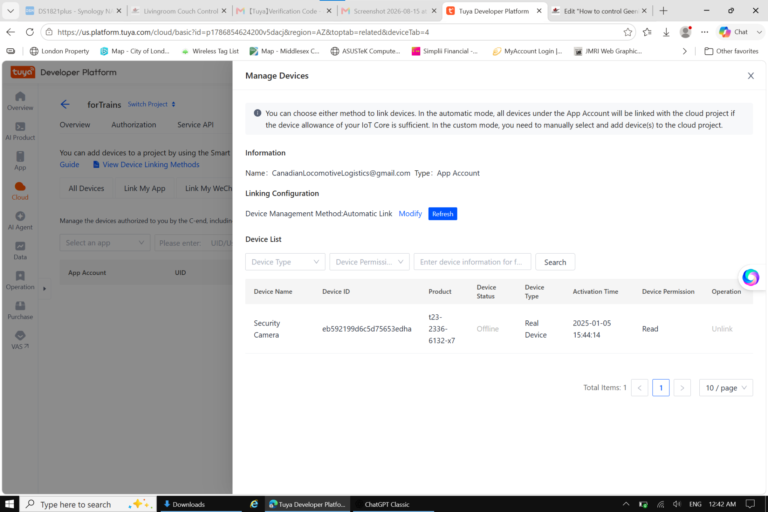
Good — the account linking worked, but this screenshot reveals something important.
Tuya is currently seeing only one device on the linked account:
Security Camera — and it’s offline.
It is not seeing “Livingroom Couch.” So we shouldn’t continue to the JavaScript/backend yet.
This likely means the account you authorized in Smart Life/Tuya is not the same device collection as your Geeni account. Even though Geeni hardware often uses Tuya technology, a device registered through Geeni does not necessarily appear automatically in a Smart Life/Tuya account.
Next step
Don’t unlink or reset anything.
Close this Manage Devices window with the X in the upper-right.
Then I want to investigate whether we can obtain the local key for your existing Geeni device without moving it out of Geeni, because that would be much better.
We already know:
Livingroom Couch
Device ID: ebf4cc8f28b07b52fcjbis
LAN IP:    192.168.1.162
If we can obtain its Local Key, we may be able to control 192.168.1.162 directly from your network and avoid the Tuya cloud altogether.
I’ll check the current methods for doing that before we change anything on your switch.